

In this blog, I'll show you how to train a neural network model using the MNIST dataset, as well as how to predict the digits in them using images.
Make sure you have the Tensorflow package installed, as it will be utilised as a Deep Learning library here.
Let's import all packages which are necessary for us
import os
import cv2
import matplotlib.pyplot as plt
import tensorflow as tf
import numpy as np
After we've imported all of the essential packages, we'll need to import the MNIST dataset, which will let us train our model. We'll split the dataset into training and testing after it's imported.
mnist = tf.keras.datasets.mnist
(x_train , y_train) , (x_test , y_test) = mnist.load_data()
x_train = tf.keras.utils.normalize(x_train , axis = 1)
x_test = tf.keras.utils.normalize(x_test , axis=1)
It's now time to put our neural network model together. Let's make our Network model with Keras.
We'll use a Flatten layer to reshape our image's dimensions to a single dimension. A Dense layer of 128 neurons , 128 neurons and 64 neurons will constitute the second , third and fourth layers, respectively. The final output layer is the Dense layer, which has 10 neurons because our MNIST dataset has ten different classes.
model = tf.keras.Sequential()
model.add(tf.keras.layers.Flatten(input_shape = (28 , 28)))
model.add(tf.keras.layers.Dense(128 , activation='relu'))
model.add(tf.keras.layers.Dense(128 , activation='relu'))
model.add(tf.keras.layers.Dense(64 , activation='relu'))
model.add(tf.keras.layers.Dense(10 , activation='softmax'))
Later let's compile the network model by specifying adam for optimizer , accuracy for metrices and sparse_categorical_crossentropy for loss
model.compile(optimizer='adam' , loss='sparse_categorical_crossentropy' , metrics=['accuracy'])
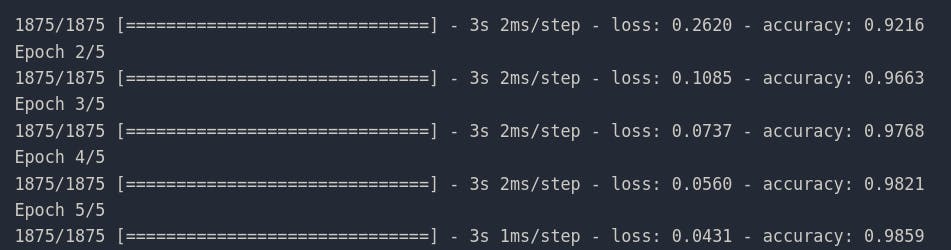
Finally, we'll use the fit function to train our model.
We must test our model after it has been trained. We'll be providing input images that were generated with figma.
Let's make a folder called digits and then put our digit images within it as digit1.png, digit2.png, and so on.
def predict_img(model):
image_number = 1
while os.path.isfile(f"digits/digit{image_number}.png"):
img = cv2.imread(f"digits/digit{image_number}.png")[:,:,0]
img = cv2.resize(img,(28 , 28))
img = np.invert(np.array([img]))
prediction = model.predict(img)
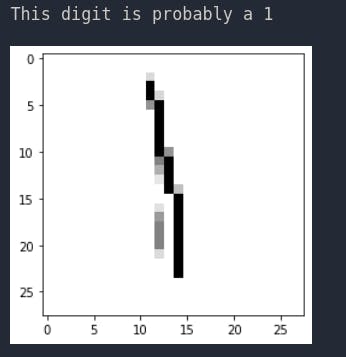
print(f"This digit is probably a {np.argmax(prediction)}")
plt.imshow(img[0] , cmap = plt.cm.binary)
plt.show()
image_number += 1
Let's use the model as a parameter to call this function.
predict_img(model)
As a result, you'll get a series of photos like the ones below


Now, let's try in a different approach by saving our model as hand_digit.h5 and using that model to make our predictions.
model.save('hand_digit.h5')

loaded_model = tf.keras.models.load_model('hand_digit.h5')

loss , accuracy = model.evaluate(x_test , y_test )
print(loss)
print(accuracy)

predict_img(loaded_model)
As a result, our final output will look like this

As a result, I've developed other networks and worked on them. The jupyter file can be found on my github repository.
Github Repo : https://github.com/ndrohith09/Hand-digit-classificaiton-using-MNIST-dataset-and-CNN
Hope i think this blog helps you to create your own CNN model for Hand Digit Recognition